
When it comes to achieving a flawless and seamless flooring installation, attention to detail is key. Whether you’re a DIY enthusiast or a professional flooring contractor, these tips and tricks will guide you toward creating the perfect seamless flooring surface.
1. Proper Subfloor Preparation
- Smooth and Clean Surface: Ensure your subfloor is clean, level, and free from debris, dust, or moisture.
- Subfloor Repair: Address any cracks, bumps, or imperfections in the subfloor before proceeding with the installation.
2. Choose the Right Flooring Material
- Consider Your Needs: Select a flooring material that suits your space’s function and style preferences.
- Quality Matters: Invest in high-quality flooring materials to ensure durability and longevity.
3. Accurate Measurements and Layout
- Precise Measurements: Measure the room accurately to avoid misalignments or wasted materials.
- Layout Planning: Plan the layout carefully to minimize the number of seams and create a seamless look.
4. Use Professional Tools
- High-Quality Tools: Invest in professional-grade tools like trowels, adhesive spreaders, and cutting equipment.
- Safety Gear: Don’t forget to wear safety gear, including goggles and knee pads, to protect yourself during installation.
5. Proper Adhesive Application
- Follow Manufacturer Instructions: Always adhere to the adhesive manufacturer’s guidelines for application and drying times.
- Avoid Over-application: Excess adhesive can lead to uneven flooring, so apply it evenly and in moderation.
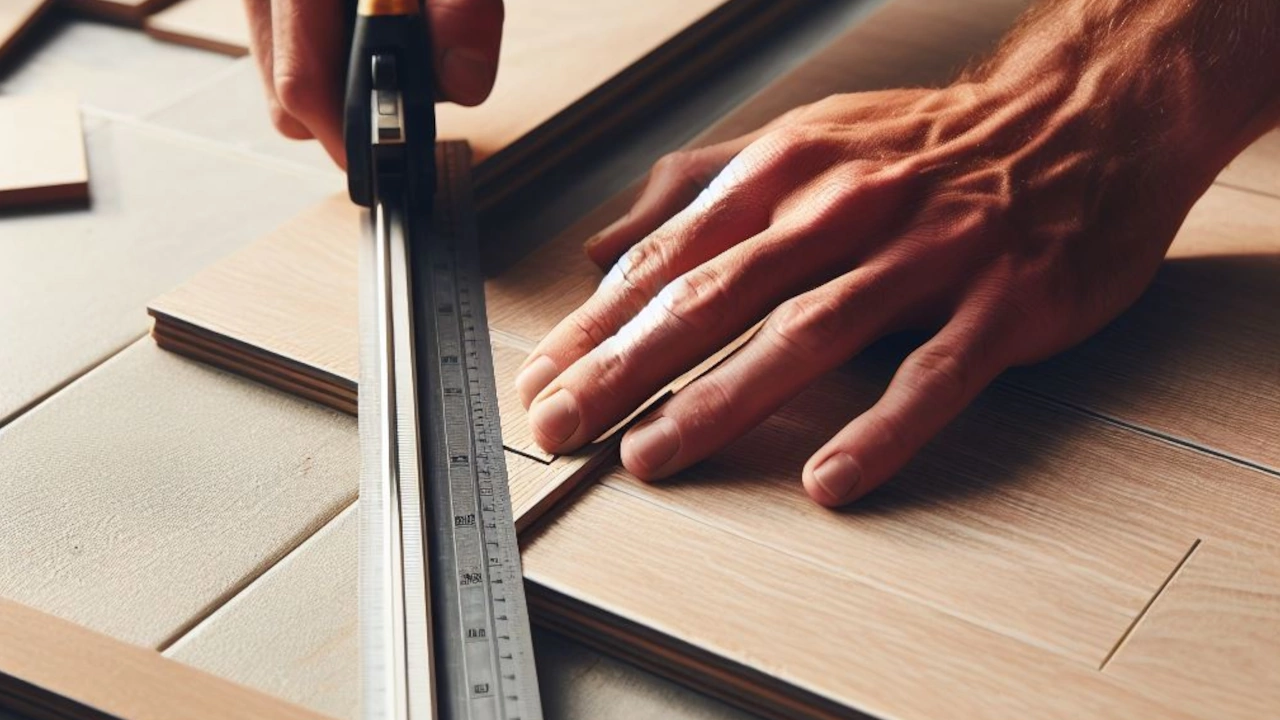
6. Precise Cutting and Trimming
- Cut with Precision: Use a sharp utility knife to cut the flooring material with precision.
- Seamless Transitions: Ensure edges and corners fit snugly for a seamless finish.
7. Seamless Sealing
- Seam Sealer: Apply a high-quality seam sealer to eliminate gaps between flooring sections.
- Smooth Application: Use a clean, lint-free cloth to apply the sealer evenly.
8. Proper Maintenance
- Regular Cleaning: Keep your seamless floor clean with regular sweeping and mopping.
- Avoid Harsh Chemicals: Use gentle cleaning products to preserve the finish and appearance.
9. Monitor for Moisture
- Moisture Testing: Periodically test for moisture in the subfloor to prevent damage to your seamless floor.
- Address Moisture Issues Promptly: If moisture is detected, take immediate action to remedy the problem.
10. Professional Help
- Consult Experts: If you’re unsure about any aspect of the installation, consult with a professional flooring contractor.
- Maintenance Services: Consider professional maintenance services to keep your seamless floor in top condition.
1. Proper Subfloor Preparation
A flawless seamless flooring installation begins with the foundation – your subfloor. Follow these essential steps to ensure your subfloor is ready for the transformation:
a. Cleanliness is Key
Before laying down any flooring material, your subfloor must be spotlessly clean. Remove all traces of dirt, dust, and debris. A vacuum cleaner and a damp mop can be valuable tools in this phase.
b. Level the Playing Field
An uneven subfloor can lead to noticeable irregularities in your seamless flooring. Use a leveling compound or self-leveling underlayment to smooth out any bumps, dents, or low spots. Follow the manufacturer’s instructions for mixing and application.
c. Address Subfloor Damage
Inspect your subfloor for cracks, holes, or any structural issues. If you find any, it’s crucial to address them before proceeding with the installation. Use appropriate patching materials to fill gaps and repair damage.
d. Moisture Matters
Moisture is a common enemy of flooring materials. Ensure your subfloor is dry and adequately ventilated. Use a moisture meter to check for excessive moisture levels. If moisture is present, it can lead to adhesive failure and flooring damage.
e. Acclimate Flooring Materials
If you’re working with natural materials like hardwood, acclimate them to the room’s temperature and humidity for at least 48 hours before installation. This prevents future warping or expansion/contraction issues.
f. Consider a Moisture Barrier
In areas prone to moisture, such as basements or bathrooms, consider installing a moisture barrier or vapor retarder to protect your seamless flooring from potential damage.
Taking the time to properly prepare your subfloor is a critical foundation for achieving a seamless and long-lasting flooring installation. Skipping or rushing through this step can lead to costly and frustrating issues down the road. So, invest time and effort into preparing your subfloor meticulously.
2. Choose the Right Flooring Material
Selecting the ideal flooring material is pivotal in achieving the perfect seamless look. Consider these factors to make an informed choice:
a. Understand Your Needs
Before you start browsing flooring options, assess the specific needs of your space:
- Traffic: Determine the level of foot traffic the area will endure. High-traffic areas may require more durable materials.
- Moisture: Consider the room’s moisture levels. Bathrooms and kitchens, for instance, need water-resistant flooring.
- Aesthetics: Think about the desired look and style. Different materials offer various aesthetic possibilities.
- Budget: Set a budget for your project to narrow down your options.
b. Flooring Material Options
Now, let’s explore some common seamless flooring materials:
i. Hardwood
- Elegance: Hardwood floors provide a timeless, classic appearance.
- Durability: They are sturdy and can last for decades with proper care.
- Variety: Numerous wood species and finishes are available to match your decor.
ii. Laminate
- Cost-Effective: Laminate flooring offers a budget-friendly option that mimics the look of hardwood or stone.
- Easy Maintenance: It’s relatively easy to clean and maintain.
- Resistance: Laminate is resistant to scratches and wear.
iii. Vinyl
- Versatility: Vinyl comes in various designs, including wood and stone patterns.
- Waterproof Options: Waterproof vinyl flooring is ideal for kitchens and bathrooms.
- Budget-Friendly: It’s often more affordable than other materials.
iv. Tile
- Durable: Tile is highly durable and resistant to moisture, making it suitable for high-traffic and wet areas.
- Design Choices: An array of designs, colors, and sizes allows for creative layouts.
- Cooling Effect: It can help keep spaces cooler in warm climates.
v. Concrete
- Modern Look: Polished concrete provides a sleek, contemporary appearance.
- Durability: It’s exceptionally durable and can withstand heavy use.
- Low Maintenance: Minimal maintenance is required to keep concrete looking pristine.
c. Quality Matters
Invest in high-quality flooring materials, even if it means stretching your budget slightly. Quality materials not only enhance the aesthetic appeal but also offer better durability and longevity.
d. Samples and Visualizations
Before making a final decision, obtain samples of your chosen flooring materials and visualize how they will look in your space. This helps you ensure the selected material complements your room’s decor.
Remember, the right flooring material sets the foundation for a seamless and beautiful floor. Consider your specific needs, budget, and aesthetic preferences when making your selection.
3. Accurate Measurements and Layout
The success of your seamless flooring project heavily relies on precise measurements and meticulous layout planning. Here’s why this step is crucial:
a. Precise Measurements
i. Measure Twice, Cut Once
Before purchasing any flooring materials, measure the room’s dimensions accurately. Here’s how to do it:
- Use a high-quality tape measure to measure the length and width of the room.
- Account for any alcoves, closets, or irregularities in the space.
- Measure diagonally from corner to corner to ensure squareness.
ii. Consider Extra Material
When ordering materials, it’s advisable to buy a little extra to account for mistakes, irregularities, or future repairs. Typically, an additional 10% is a safe margin.
b. Layout Planning
i. Create a Layout Plan
Planning how you’ll lay the flooring materials is essential for achieving a seamless finish. Consider the following:
- Seam Placement: Strategically place seams where they’ll be least noticeable, often along walls or in less visible areas.
- Pattern Alignment: If you’re working with patterned materials, plan how they will align and flow throughout the room.
- Transition Areas: Think about how the flooring will transition to other rooms or different flooring materials.
ii. Minimize Waste
Efficient layout planning can help minimize material waste. By optimizing the placement of cuts and seams, you can save money and reduce environmental impact.
iii. Dry Fit
Before applying adhesive, dry fit your flooring materials without attaching them. This allows you to double-check measurements and the layout plan for accuracy.
c. Tools for Accuracy
Invest in the following tools to ensure precision during measurement and layout:
- Carpenter’s Square: Use it to check corners for squareness.
- Chalk Line: Helpful for marking straight lines across the subfloor.
- Right Angle Tool: Ensures angles are exactly 90 degrees.
- Digital Laser Measure: Provides highly accurate measurements for large areas.
d. Seek Professional Assistance
If you’re unsure about measuring or planning the layout, consider consulting with a professional flooring installer. They have the expertise and tools to ensure accuracy.
Accurate measurements and thoughtful layout planning are the foundation of a seamless flooring project. Skipping or rushing through this step can result in misaligned seams, wasted materials, and costly mistakes. By investing time and care in measurement and layout, you set the stage for a successful and visually appealing seamless floor installation.
4. Use Professional Tools
When it comes to achieving a seamless flooring finish, having the right tools is as important as your skill and expertise. Professional tools ensure accuracy, efficiency, and a top-notch result. Here’s why they matter:
a. Quality Matters
Investing in high-quality, professional-grade tools is a smart choice for several reasons:
- Precision: Professional tools are engineered for accuracy, ensuring your measurements, cuts, and installations are precise.
- Durability: They are built to withstand the demands of flooring projects, providing longevity and reliability.
- Ease of Use: Professional tools are designed to be user-friendly, making your job smoother and more efficient.
b. Essential Flooring Tools
Here are some essential professional tools for your seamless flooring project:
i. Trowels
- Notched Trowel: Used to apply adhesive evenly to the subfloor.
- Margin Trowel: Perfect for getting adhesive into tight spaces and corners.
ii. Adhesive Spreader
- Adhesive Spreader: Ensures consistent adhesive application, preventing unevenness in your flooring.
iii. Cutting Tools
- Utility Knife: Ideal for precise cuts on various flooring materials.
- Tile Cutter: For clean and accurate cuts on ceramic or porcelain tiles.
- Jigsaw: Useful for intricate cuts or curves.
iv. Flooring Roller
- Flooring Roller: Essential for applying pressure to adhesive materials and ensuring a secure bond.
v. Moisture Meter
- Moisture Meter: Helps in checking subfloor moisture levels, ensuring they are within acceptable limits.
vi. Safety Gear
- Knee Pads: Protect your knees from strain during installation.
- Safety Goggles: Keep your eyes safe from dust and debris.
c. Maintenance Tools
Don’t forget about tools for maintenance once your seamless floor is installed:
i. Microfiber Mop
- Microfiber Mop: Ideal for regular cleaning, as it effectively removes dust and debris without scratching the surface.
ii. Seam Sealer Applicator
- Seam Sealer Applicator: Necessary for applying seam sealer evenly to create invisible seams.
d. Professional Training
Using professional tools also requires knowledge and training. If you’re new to flooring installations, consider taking a course or seeking guidance from experienced professionals.
e. Safety First
Always prioritize safety when using professional tools. Follow safety guidelines and wear appropriate protective gear to prevent accidents and injuries.
By using professional tools, you ensure that your seamless flooring project proceeds smoothly, efficiently, and with precision. The investment in quality tools pays off in the form of a flawless and long-lasting finish.
5. Proper Adhesive Application
The way you apply adhesive during a flooring project can make or break the seamlessness of the final result. Follow these guidelines to ensure adhesive is applied correctly:
a. Follow Manufacturer Instructions
Each type of adhesive comes with specific instructions from the manufacturer. Always read and follow these guidelines carefully. Manufacturer recommendations will cover:
- Type of adhesive: Different flooring materials require different adhesives.
- Application method: Some adhesives are spread with a trowel, while others may be rolled or brushed on.
- Drying time: Understand how long the adhesive needs to set before laying the flooring material.
b. Even Application
Achieving a smooth, seamless finish starts with applying adhesive evenly to the subfloor. Here’s how:
i. Notched Trowel
- If using a notched trowel, hold it at a 45-degree angle and spread the adhesive uniformly over the subfloor. The notches in the trowel help control the adhesive thickness.
ii. Adhesive Spreader
- For certain adhesives, an adhesive spreader is more effective. It ensures an even coat and minimizes excess adhesive.
c. Avoid Over-Application
Applying too much adhesive can lead to problems such as uneven flooring and longer drying times. Over-application also wastes adhesive. Follow these tips to avoid overdoing it:
- Pay attention to the adhesive’s recommended coverage rate per square foot.
- Use a margin trowel to get adhesive into tight spaces and corners without excessive buildup.
d. Open Time
Open time refers to the duration during which adhesive remains workable after application. It’s essential to lay the flooring material within the specified open time to ensure a secure bond. Exceeding the open time can lead to adhesion issues.
e. Temperature and Humidity
The ambient temperature and humidity levels can affect adhesive performance. Make sure they fall within the manufacturer’s recommended range during installation.
f. Check Subfloor Moisture
Moisture in the subfloor can negatively impact adhesive performance. Use a moisture meter to check for excessive moisture levels before applying adhesive. Address any moisture issues accordingly.
g. Roll or Press the Flooring
After laying down the flooring material, use a flooring roller or apply pressure with your hands to ensure a strong bond between the material and adhesive. This step helps eliminate air pockets and potential unevenness.
h. Clean Excess Adhesive
As you work, be diligent in cleaning up any adhesive that may squeeze out between seams. It’s easier to clean up while it’s wet rather than after it dries.
Proper adhesive application is a critical step in achieving a seamless flooring installation. Following manufacturer instructions, applying adhesive evenly, and avoiding common mistakes like over-application are key to ensuring your flooring material adheres securely to the subfloor. A well-applied adhesive contributes to the durability and aesthetics of your seamless floor.
6. Precise Cutting and Trimming
Achieving a seamless flooring finish relies on meticulous cutting and trimming of flooring materials. Here’s why precision in this step is crucial:
a. Clean and Professional Look
Accurate cutting and trimming result in clean and professional-looking edges and corners. Seamless transitions between flooring sections create a visually pleasing effect.
b. Eliminating Gaps and Overlaps
Precision cutting ensures that flooring pieces fit snugly against walls and in tight spaces, leaving no unsightly gaps or overlaps. This is especially important for achieving a seamless appearance.
c. Tools for Accurate Cuts
To achieve precise cuts and trims, use the appropriate tools for the type of flooring material you are working with:
i. Utility Knife
- A sharp utility knife is a versatile tool for cutting a wide range of materials, including vinyl, laminate, and carpet.
ii. Tile Cutter
- If you’re working with tile, a tile cutter provides clean, straight cuts and is essential for achieving precise edges.
iii. Jigsaw
- For more intricate cuts or curves, a jigsaw can be highly effective, especially when working with hardwood or engineered wood.
d. Measure Twice, Cut Once
Before making any cuts, measure and mark your flooring materials carefully. Double-check your measurements to ensure accuracy. Remember the old carpentry adage: “Measure twice, cut once.”
e. Straight Edges
When cutting straight lines, use a straightedge or a carpenter’s square to guide your knife or cutting tool. This helps maintain a consistent, straight edge.
f. Trim Excess Seam Material
If you’re working with materials that have seams, such as carpet or vinyl, trim excess material precisely along the seam line. Using a sharp knife and a straightedge will help achieve clean, seamless seams.
g. Dry Fit Before Adhesive
Before applying adhesive, dry fit your cut pieces. This step ensures that all cuts are accurate, and the pieces fit together seamlessly. Adjustments can be made before the adhesive is applied.
h. Wear Safety Gear
Always wear appropriate safety gear, such as gloves and safety glasses, when cutting and trimming flooring materials to protect yourself from potential accidents.
i. Consider Professional Help
If you’re unsure about making precise cuts or handling intricate patterns, it’s worth considering professional assistance to ensure the best results.
Precise cutting and trimming are vital steps in achieving a seamless flooring installation. The extra effort you put into measuring accurately and using the right tools pays off in the form of a clean, professional finish. A well-executed cutting and trimming process enhances the overall aesthetics and functionality of your seamless floor.
7. Seamless Sealing
Seamless sealing is a critical step to achieve a truly flawless flooring installation. It plays a crucial role in ensuring the durability and aesthetics of your seamless floor. Here’s why it’s essential:
a. Eliminating Gaps
Seam sealing is the process of filling gaps, joints, and seams between flooring materials to create a smooth and uninterrupted surface. This prevents dust, moisture, and debris from accumulating in these areas, ensuring a cleaner and healthier environment.
b. Enhancing Aesthetics
Proper seam sealing results in nearly invisible seams, creating a cohesive and visually pleasing appearance. This is especially important when working with materials like vinyl, carpet, or linoleum, where seams can be more noticeable.
c. Improving Durability
Seams, if left untreated, can be vulnerable to wear and tear. By sealing the seams, you reinforce the structural integrity of the flooring and increase its lifespan.
d. Water and Moisture Resistance
Sealing seams is particularly important in areas prone to moisture, such as kitchens and bathrooms. It prevents water from seeping between flooring sections, which can lead to subfloor damage and mold growth.
e. Types of Seam Sealers
Depending on the type of flooring material, there are different seam sealers to consider:
i. Seam Adhesive
- Seam adhesive is commonly used for vinyl and linoleum flooring. It creates a strong and waterproof bond between seams.
ii. Seam Tape
- Carpet installers often use seam tape, which is applied to the underside of the carpet and heat-activated to create a secure and nearly invisible seam.
iii. Seam Filler
- For materials like hardwood or laminate, seam filler is used to fill gaps and create a seamless appearance. It’s available in various colors to match your flooring.
f. Proper Application
Follow these steps for seamless seam sealing:
- Clean the seam area thoroughly to remove any dirt, debris, or adhesive residue.
- Apply the appropriate seam sealer or adhesive according to the manufacturer’s instructions.
- Ensure even application and wipe away any excess sealer.
- Allow sufficient drying or curing time before placing furniture or heavy objects on the sealed seams.
g. Professional Assistance
For complex or extensive installations, especially in commercial spaces, consider hiring a professional flooring contractor with experience in seam sealing. They have the expertise and specialized tools to achieve flawless results.
Seamless sealing is the final touch that brings your flooring project together. It not only enhances the aesthetics but also ensures the longevity and functionality of your seamless floor. Properly sealed seams contribute to a cleaner, healthier, and more durable environment.
8. Proper Maintenance
Maintaining your seamless flooring is essential for preserving its beauty and functionality over time. Regular upkeep not only extends the lifespan of your flooring but also ensures it continues to look seamless and inviting. Here’s why proper maintenance matters:
a. Aesthetic Preservation
Proper cleaning and maintenance prevent the buildup of dirt, stains, and grime that can detract from the seamless appearance of your flooring. A well-maintained floor maintains its original luster and beauty.
b. Longevity
Regular maintenance, including cleaning and periodic refinishing (for certain materials like hardwood), extends the lifespan of your flooring. This saves you money in the long run by delaying the need for costly replacements.
c. Preventing Damage
Promptly addressing spills, scratches, and wear prevents damage from worsening. Timely repairs and maintenance can keep your flooring looking seamless and like new.
d. Health and Hygiene
Clean and well-maintained flooring contributes to a healthier indoor environment by reducing allergens, dust, and mold. This is especially important for people with allergies or respiratory issues.
e. Maintenance Tips
Here are some essential maintenance tips to keep your seamless flooring in top condition:
i. Regular Cleaning
- Sweep or vacuum your floor regularly to remove dirt and debris.
- Use a damp mop with a suitable cleaning solution for your flooring material.
- Avoid harsh chemicals that can damage the finish.
ii. Stain Management
- Act quickly to clean up spills to prevent staining.
- Use the appropriate stain-removing techniques for your flooring material.
iii. Area Rugs and Mats
- Place area rugs or mats in high-traffic areas to protect your seamless floor from excessive wear.
- Use felt pads under furniture legs to prevent scratches and dents.
iv. Refinishing (if applicable)
- For materials like hardwood, consider refinishing when the finish starts to show wear and tear.
v. Inspect and Repair
- Periodically inspect your floor for any damage or wear and tear.
- Address any issues promptly with the necessary repairs or maintenance.
f. Professional Maintenance
For complex flooring materials or extensive installations, consider professional maintenance services. Flooring professionals have the expertise and equipment to perform deep cleaning, refinishing, and repairs to keep your seamless floor in pristine condition.
g. Regular Moisture Checks
If your seamless floor is in a space where moisture can be an issue, such as a basement, periodically check the subfloor for moisture levels. This helps you catch potential problems early and prevent damage.
Proper maintenance is the key to enjoying the benefits of your seamless flooring for years to come. By following a regular maintenance routine, addressing issues promptly, and seeking professional help when needed, you can ensure that your seamless floor remains a source of pride and comfort in your home.
9. Monitor for Moisture
Moisture can be a silent threat to the integrity of your seamless flooring. Regular monitoring for moisture levels is vital to prevent potential damage and maintain the longevity of your flooring. Here’s why it matters:
a. Prevents Subfloor Damage
Excessive moisture in the subfloor can lead to warping, swelling, and even structural damage over time. This can compromise the stability and appearance of your seamless floor.
b. Minimizes Mold and Mildew
Moisture buildup in the subfloor or beneath flooring materials creates an ideal environment for mold and mildew growth. These not only damage the floor but can also have health implications.
c. Preserves Flooring Materials
Different flooring materials have varying levels of moisture tolerance. Monitoring moisture levels helps ensure that your chosen flooring material remains in optimal condition.
d. Early Detection
Regular moisture checks allow you to detect potential issues early, enabling timely intervention and minimizing repair costs.
e. Factors Affecting Moisture
Several factors can contribute to moisture issues in your flooring:
i. Subfloor Moisture
- The condition of the subfloor beneath your seamless flooring is a critical factor. Subfloors should be dry and properly prepared.
ii. Climate and Location
- Your geographical location, climate, and local humidity levels can impact moisture in your flooring. Areas with high humidity levels are more prone to moisture-related issues.
iii. Plumbing Leaks
- Leaking pipes or plumbing issues can introduce moisture to your subfloor, causing damage over time.
iv. Concrete Subfloors
- Concrete subfloors can absorb moisture, especially if they are not adequately sealed or if the groundwater table is high.
f. Moisture Testing
Consider the following methods for monitoring moisture levels:
i. Moisture Meters
- Moisture meters are handy tools that measure moisture content in subfloors. They provide a quick and non-invasive way to check for moisture levels.
ii. Relative Humidity (RH) Testing
- RH testing is a more in-depth method that involves placing sensors in the subfloor to measure moisture levels over time. It provides a more accurate picture of moisture conditions.
g. Addressing Moisture Issues
If you detect elevated moisture levels, it’s crucial to address the issue promptly:
- Identify and fix the source of moisture, whether it’s a leak, poor ventilation, or high humidity.
- Allow the subfloor to dry thoroughly before proceeding with any repairs or flooring installations.
h. Professional Assistance
For extensive moisture issues or if you’re uncertain about how to address them, consult with a professional flooring contractor or moisture remediation specialist. They can provide expert guidance and solutions.
Monitoring for moisture is a proactive step in preserving the integrity and longevity of your seamless flooring. Regular checks, especially in areas prone to moisture, can help you catch and address potential issues before they become costly and damaging problems.
10. Professional Help
While many aspects of a flooring project can be DIY-friendly, there are situations where seeking professional help is not only beneficial but also essential. Here’s why involving professionals is important:
a. Expertise and Experience
Professional flooring contractors bring years of experience and expertise to the table. They understand the intricacies of different flooring materials and can handle complex installations with precision.
b. Right Tools and Equipment
Professionals have access to specialized tools and equipment designed for flooring installations. These tools can ensure a smoother and more efficient process.
c. Time Efficiency
Professionals work efficiently, saving you time and reducing the inconvenience of a prolonged installation. They can often complete a project in less time than a DIY enthusiast.
d. Precision and Accuracy
Professionals are trained to measure, cut, and install flooring materials with precision. This results in a seamless and flawless finish that might be challenging to achieve on your own.
e. Avoiding Costly Mistakes
Errors made during a flooring installation can be costly to rectify. Professionals are less likely to make mistakes that could lead to wasted materials or the need for extensive repairs.
f. Warranty Considerations
Some flooring manufacturers require professional installation to honor warranties. Hiring a pro ensures you’re covered in case of unexpected issues.
g. Complex Installations
For intricate patterns, custom designs, or unusual layouts, professional help becomes crucial. Complex installations demand a high level of skill and experience.
h. Compliance with Building Codes
Professionals are well-versed in local building codes and regulations. They ensure that your flooring project complies with these codes, avoiding potential legal and safety issues.
i. Safety
Flooring installations can involve working with adhesives, heavy materials, and sharp tools. Professionals prioritize safety and have the training to handle potential hazards.
j. Problem Solving
In the event of unexpected issues or complications during the installation, professionals have the knowledge to adapt and find solutions quickly.
k. Post-Installation Services
Many professional flooring contractors offer post-installation services, including maintenance, refinishing, and repairs. This ensures your seamless floor remains in top condition for years to come.
l. Peace of Mind
Hiring professionals gives you peace of mind knowing that your project is in capable hands. You can relax and enjoy the process without worrying about potential pitfalls.
When to Consider Professional Help:
- Complex Projects: If your flooring project involves intricate patterns, custom designs, or unconventional layouts.
- High-Value Materials: When working with high-end or expensive flooring materials that require precision handling.
- Large Spaces: For extensive installations, especially in commercial spaces, where time efficiency is critical.
- Uncertainty: If you’re unsure about any aspect of the installation, it’s better to consult with a professional to avoid costly mistakes.
The professional help is a valuable resource for ensuring the success of your seamless flooring project. Whether it’s for expert guidance, precision installation, or managing complex tasks, involving professionals can lead to a smoother, more efficient, and ultimately more satisfying flooring experience.
Seamless Flooring – Your Ultimate Guide Conclusion
In your quest for a flawless and seamless flooring installation, you’ve embarked on a journey that combines artistry, precision, and careful planning. From subfloor preparation to professional assistance, every step plays a crucial role in achieving your desired outcome. As you conclude your ultimate guide to seamless flooring, here are some key takeaways:
- Preparation is Paramount: A solid foundation begins with proper subfloor preparation. Take the time to ensure your subfloor is clean, level, and free from moisture issues. This sets the stage for a successful installation.
- Choose Wisely: Selecting the right flooring material is an art in itself. Consider factors such as aesthetics, durability, budget, and maintenance requirements. The material you choose will shape the entire look and feel of your space.
- Tools Matter: Professional-grade tools are your allies in achieving precision and efficiency. Invest in the right tools for the job, and they will repay you with a seamless finish.
- Detail-Oriented Work: Whether it’s measuring, cutting, or sealing, attention to detail is your ally. Measure accurately, cut precisely, and seal seamlessly to ensure the perfect installation.
- Maintenance is Key: Your seamless floor’s longevity depends on proper maintenance. Regular cleaning, stain management, and addressing issues promptly are essential to preserve its beauty and functionality.
- Moisture Management: Keep moisture in check by monitoring for excess in your subfloor. Early detection and prevention are key to avoiding costly damage.
- Professional Assistance: Know when to seek professional help. Professionals bring expertise, tools, and efficiency to the table, especially for complex installations or when you’re uncertain about certain aspects.
In the world of seamless flooring, your attention to detail, commitment to quality, and willingness to adapt are your greatest assets. By following this ultimate guide and putting these principles into practice, you’ll transform your space into a seamless oasis of beauty and comfort, where every step is a pleasure.
Embark on your seamless flooring journey with confidence, and enjoy the satisfaction of a job well done. Your dream of a truly seamless floor is within reach, and the results will be a testament to your dedication to excellence.